Model Management
In the Model Management module, you can configure your app’s basic information and connect every model the platform needs, including large language models, embedding models, and vision-language models. Nexent supports multiple providers so you can pick the best option for each scenario.
🖼️ App Configuration
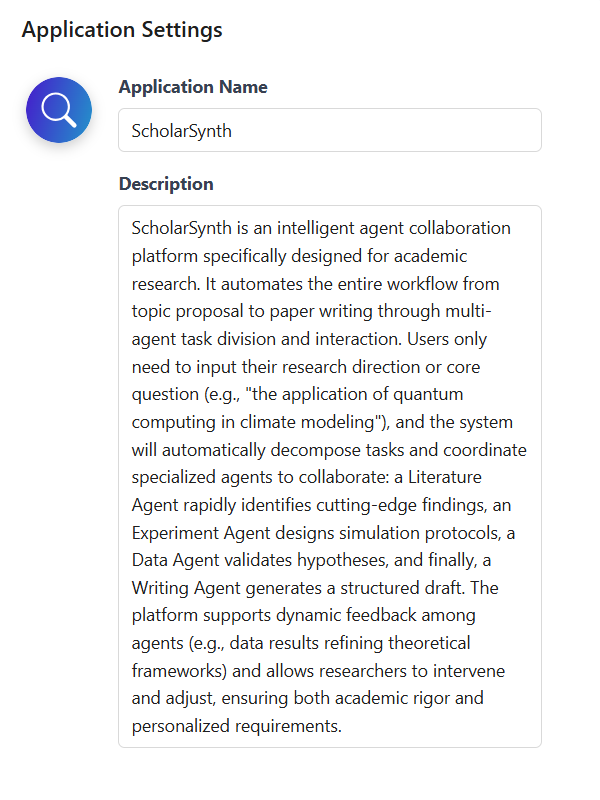
App configuration is the first step of model management. Configure the icon, name, and description so users can instantly recognize the app and the platform can pass the proper context to models.
- The icon and name appear in the upper-left corner of the chat page.
- The description is used as background information when generating agents to improve the model’s understanding of your use case.
App Icon Configuration
Click the app icon to open the configuration panel. Nexent provides two options:
- Use a preset icon: Pick an icon from the built-in gallery and optionally change the background color for fast setup.
- Upload a custom image: Supports PNG and JPG (≤2 MB).
App Name & Description
App Name
- Displayed on the chat page, helping users recognize the current app.
- Keep it short, descriptive, and free of special characters.
App Description
- Passed to the model as background context.
- Highlight the core capabilities and keep the text fluent and concise.
🤖 Model Configuration
🔄 Sync ModelEngine Models
Nexent supports seamless integration with the ModelEngine platform.
👉 Click Edit ModelEngine Configuration in the upper right corner of the page, enter your API key, and you can retrieve all models deployed on ModelEngine.
🛠️ Add Custom Models
Add a Single Model
- Add a custom model
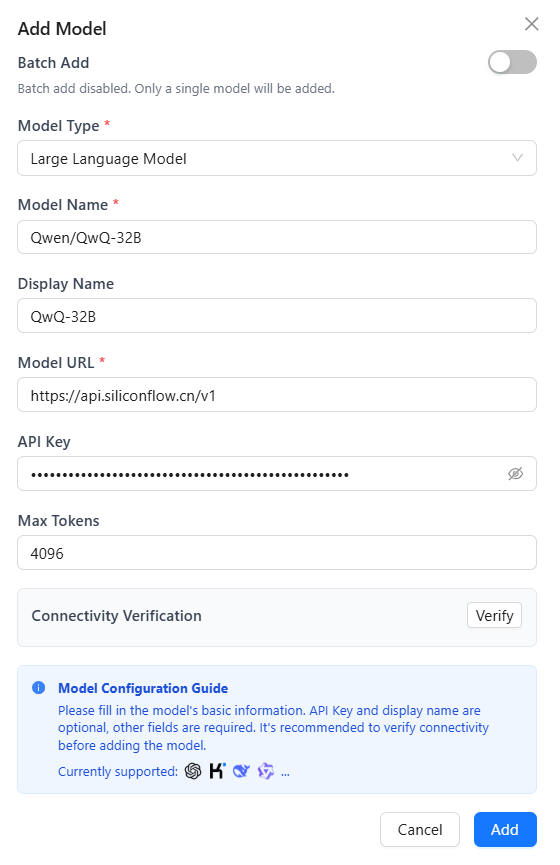
- Click Add Custom Model to open the dialog.
- Select model type
- Choose Large Language Model, Embedding Model, or Vision Language Model.
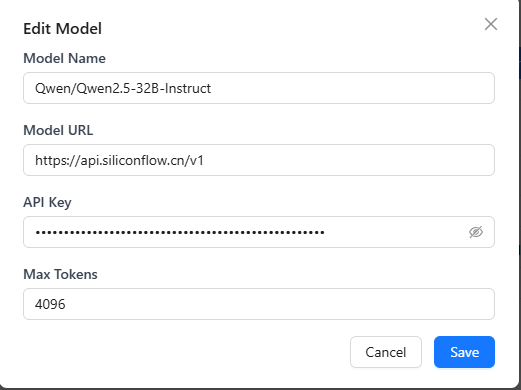
- Configure model parameters
- Model Name (required): The name you send in API requests.
- Display Name: Optional label shown in the UI (defaults to the model name).
- Model URL (required): API endpoint from the provider.
- API Key: Your provider key.
⚠️ Notes
- Model names usually follow
series/model. Example:Qwen/Qwen3-8B.- API endpoints come from the provider docs. For SiliconFlow, examples include
https://api.siliconflow.cn/v1(LLM, VLM) andhttps://api.siliconflow.cn/v1/embeddings(embedding).- Generate API keys from the provider’s key management console.
- Connectivity verification
- Click Verify to send a test request and confirm connectivity.
- Save model
- Click Add to place the model in the available list.
Batch Add Models
Use batch import to speed up onboarding:
- Enable the Batch Add Models toggle in the dialog.
- Select a model provider.
- Choose the model type (LLM/Embedding/Vision).
- Enter the API Key (required).
- Click Fetch Models to retrieve the provider list.
- Toggle on the models you need (disabled by default).
- Click Add to save every selected model at once.

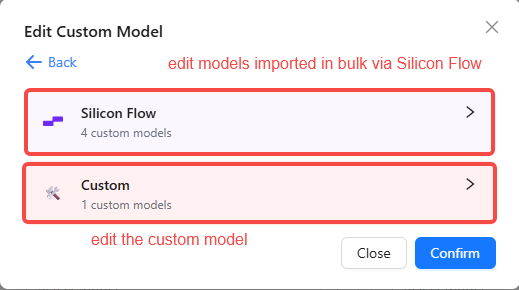
🔧 Edit Custom Models
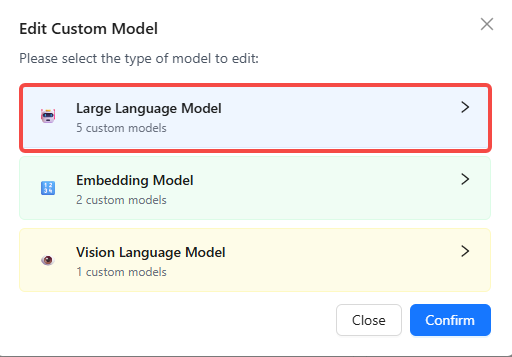
Modify or delete models anytime:
- Click Edit Custom Models.
- Select the model type (LLM/Embedding/Vision).
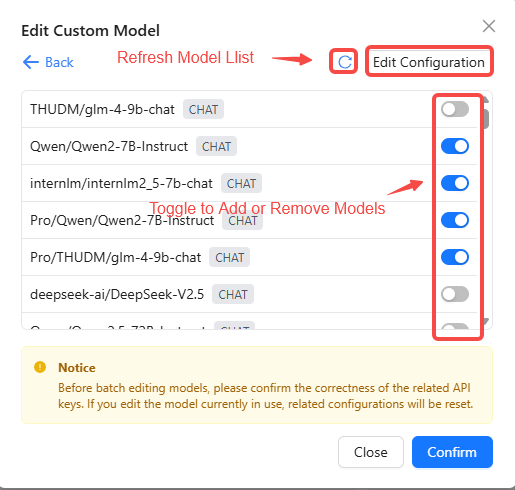
- Choose between batch editing or single-model editing.
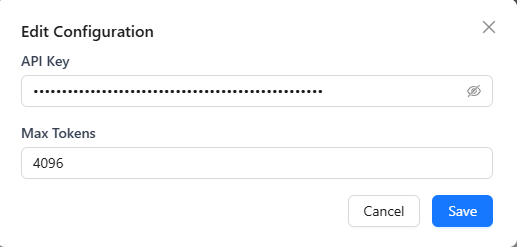
- For batch edits, toggle models on/off or click Edit Config in the upper-right to change settings in bulk.
- For single models, click the trash icon 🗑️ to delete, or click the model name to open the edit dialog.

⚙️ Configure System Models
After adding models, assign the platform-level defaults. These models handle system tasks such as title generation, real-time file reading, and multimodal parsing. Individual agents can still choose their own run-time models.
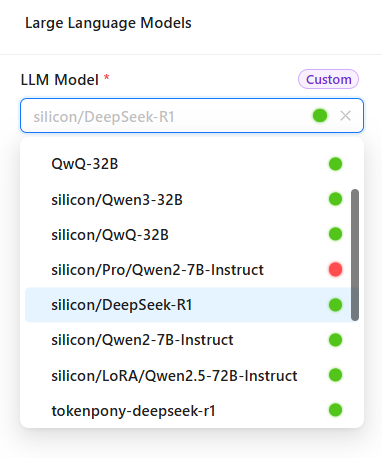
Base Model
- Used for core platform features (title generation, real-time file access, basic text processing).
- Choose any added large language model from the dropdown.
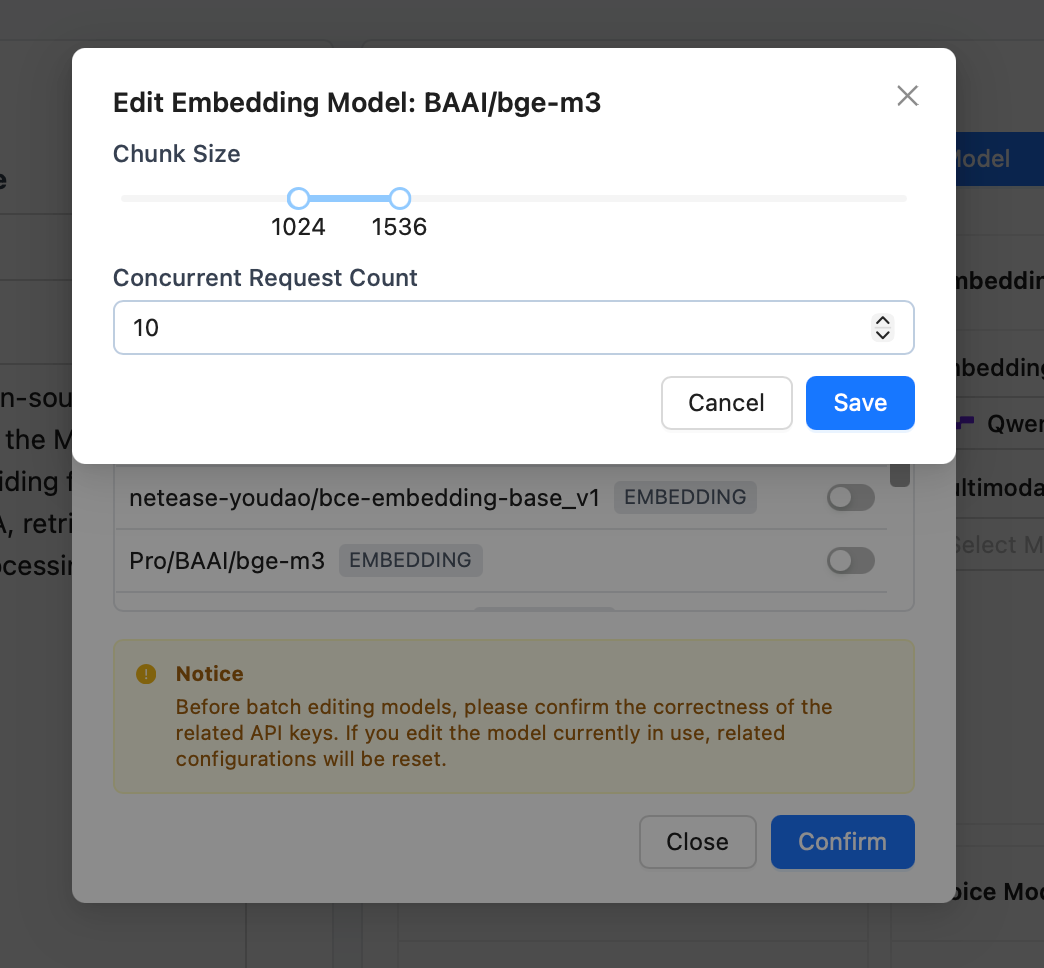
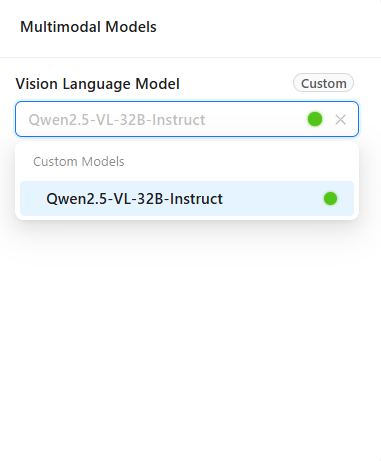
Embedding Model
Embedding models are primarily used for vectorization processing of text, images, and other data in knowledge bases, forming the foundation for efficient retrieval and semantic understanding. Configuring an appropriate embedding model can significantly improve knowledge base search accuracy and multimodal data processing capabilities.
- Click the embedding model dropdown to select one from the added embedding models.
- Embedding model configuration affects the stable operation of knowledge bases.
Choose appropriate document chunk size and chunks per request based on model capabilities. Smaller chunks provide more stability, but may affect file parsing quality.
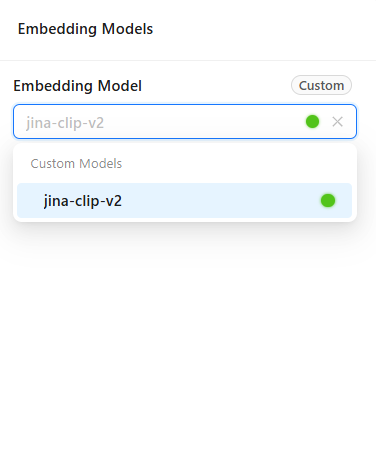
Vision-Language Model
- Required for multimodal chat scenarios (for example, when users upload images).
- Pick one of the added vision-language models.
✅ Check Model Connectivity
Run regular connectivity checks to keep the platform healthy:
- Click Check Model Connectivity.
- Nexent tests every configured system model automatically.
Status indicators:
- 🔵 Blue dot – Checking in progress.
- 🔴 Red dot – Connection failed; review configuration or network.
- 🟢 Green dot – Connection is healthy.
Troubleshooting tips:
- Confirm network stability.
- Ensure the API key is valid and not expired.
- Check the provider’s service status.
- Review firewall and security policies.
🤖 Supported Providers
Large Language Models
Nexent supports any OpenAI-compatible provider, including:
Getting started:
- Sign up at the provider’s portal.
- Create and copy an API key.
- Locate the API endpoint (usually ending with
/v1). - Click Add Custom Model in Nexent and fill in the required fields.
Multimodal Vision Models
Use the same API key and URL as LLMs but specify a multimodal model name, for example Qwen/Qwen2.5-VL-32B-Instruct on SiliconFlow.
Embedding Models
Use the same API key as LLMs but typically a different endpoint (often /v1/embeddings), for example BAAI/bge-m3 from SiliconFlow.
Speech Models
Currently only VolcEngine Voice is supported and must be configured via .env:
- Website: volcengine.com/product/voice-tech
- Free tier: Available for individual use
- Highlights: High-quality Chinese/English TTS
Steps:
- Register a VolcEngine account.
- Enable the Voice Technology service.
- Create an app and generate an API key.
- Configure the TTS/STT settings in your environment.
💡 Need Help
If you run into provider issues:
- Review the provider’s documentation.
- Check API key permissions and quotas.
- Test with the provider’s official samples.
- Ask the community in our Discord server.
🚀 Next Steps
After closing the Model Management flow, continue with:
- Knowledge Base – Create and manage knowledge bases.
- Agent Development – Build and configure agents.
Need help? Check the FAQ or open a thread in GitHub Discussions.